最初のステップ:最初の安全で本番環境のイメージを実行する
コンテナベースのイメージは、アプリケーションのセキュリティの基盤を形成します。その基盤に脆弱性がある場合、その上に構築されたすべてのサービスは同じリスクを負います。
Dockerはその方程式を変えました。Docker Hardened Images(DHI)のリリースにより、本番レベルのハード化されたベースイメージがすべての開発者に無料で提供できるようになりました。つまり、ほぼゼロの CVE とより小さなフットプリントがすべての人の基準となることを意味します。
しかし、規制された業界(金融、医療、公共部門など)など特定の要件を持つ組織では、「安全な基準値」だけでは不十分です。「保証された、コンプライアンスのあるセキュリティ」が必要です。そして、長期的なレガシーアプリケーションを維持する場合は、長期的な保証が必要です。ここで DHIエンタープライズ および 拡張ライフサイクルサポート(ELS )が役立ちます。
- DHI:すべての開発者に無料で。最小限の画像、ほぼゼロのCVE、そしてSLSAレベルの出所 3 。
- DHIエンタープライズ:重大脆弱性、FIPSおよびCIS準拠、画像カスタマイズに対して 7日パッチSLAを必要とする組織向けです。
- DHI ELS:長期的な安定性のために。上流のエンドオブライフ後、最大 5 年間セキュリティパッチを延長します。
30日間のトライアルで何を期待すればいいですか?
標準のハード画像は永久に無料で使用できますが、 30日のエンタープライズトライアルは高度なコンプライアンスおよびガバナンス機能を評価するのに最適な機会です。それだけで重要な問いに答えるのに十分な時間です。つまり、開発者の ペースを落とさずに 厳格な要件( FIPS/CISやサ プライチェーンポリシーなど)を達成できるのか?
この試験は単に画像が動作するかどうかのテストだけでなく、コンプライアンスワークフローのテストも含まれます。FIPSモードの有効化、署名の検証、画像のカスタマイズ、そしてDHI画像をスタックで使用する利点の測定です。
試験終了時には 具体的な結果が得られるはずです:
- CVEの前後数、
- 画像移行ごとに必要なエンジニアリング作業、
- あなたのチームが実際にこれを使うかどうかも。
実際のプロジェクトでテストすることは、約束よりも常に輝きます。
DHIのクイックスタートガイドでは、手順を順に説明しています。この投稿では、医師が触れない点、つまり混乱するポイント、実際に重要な指標、そして結果を簡単に評価する方法について解説します。
ステップ 1:DHIカタログの理解
ビジネストライアルを始めるには、ビジネスオーナーまたは編集者である必要があります。つまり、ミラーイメージを交換できる独自のリポジトリが手に入りますが、この点については後ほど触れます。
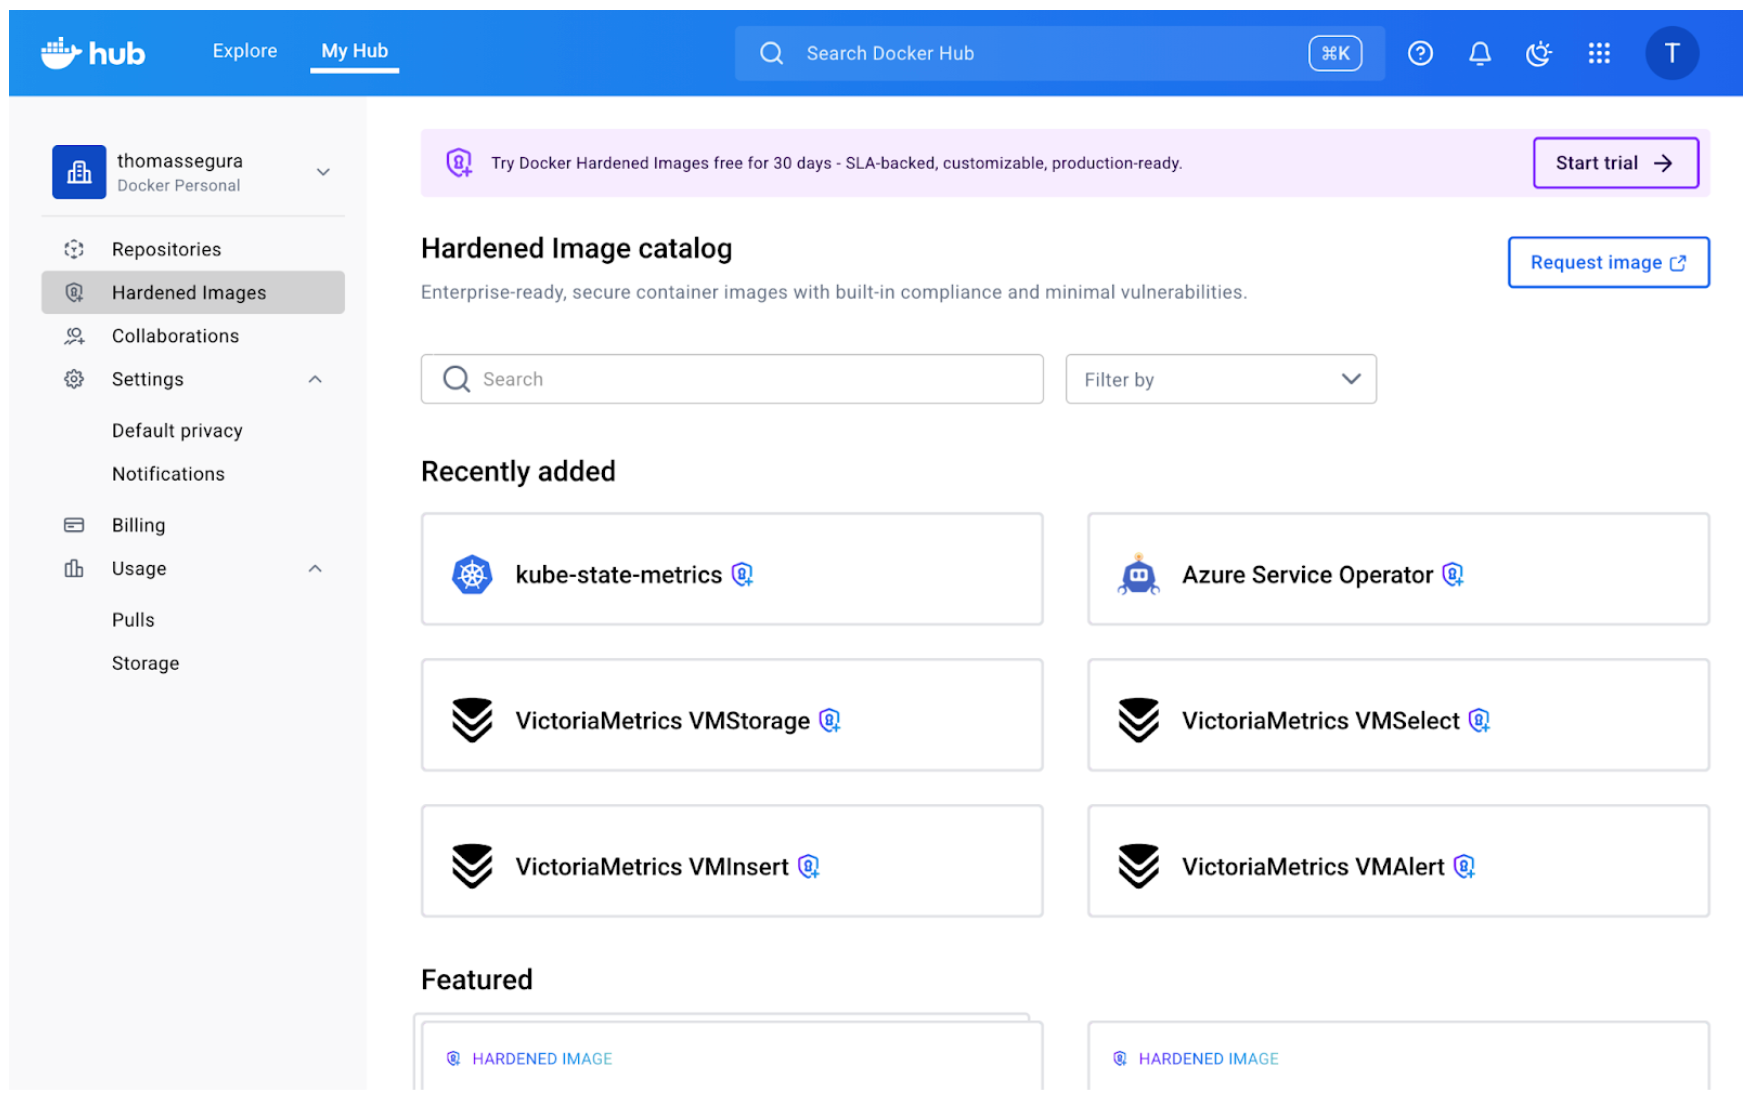
もしDocker Hubに馴染みがあるなら、DHIカタログはすでに見覚えがあるはずです:

最も明白な違いは、硬化画像を示す小さなロックアイコンです。しかし、それは具体的に何を意味するのでしょうか?
ハード化イメージの核心概念は、攻撃 面を最小限に抑えることです。これは実際には厳密な最小限のみが含まれることを意味します(UbuntuやDebianのような「バッテリー内蔵」ディストリビューションとは異なります)。
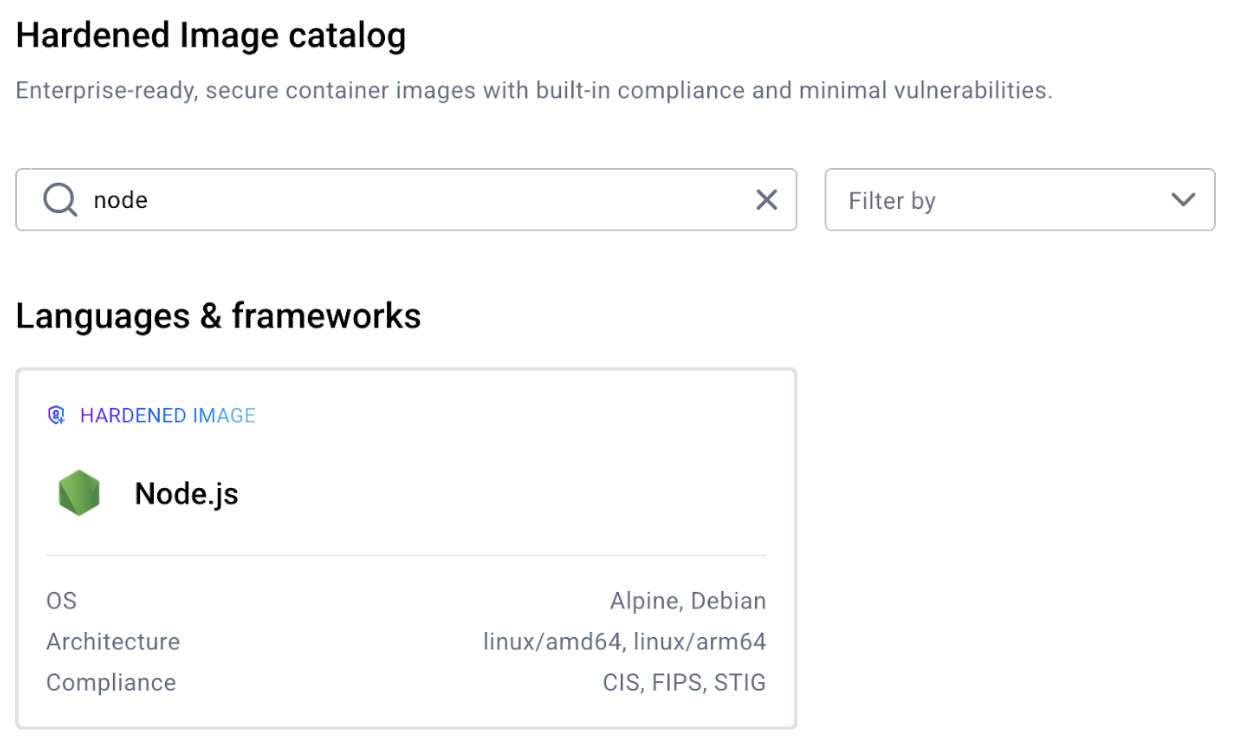
こう考えてみてください:強化されたイメージは、ディストリビューションのコア特性(libc、ファイルシステムの階層構造、パッケージ名)との互換性を維持しつつ、攻撃面を増やす利便性層(パッケージマネージャー、追加ユーティリティ、デバッグツール)を除去します。したがって、各DHIの下に「OS」と表示されていることは、このイメージがそれらのディストリビューション上に構築されている(同じベースOSを使用)が、セキュリティ強化とパッケージ最小化が適用されていることを意味します。

時には、開発やテストのためにこれらの便利なLinuxユーティリティ が必要 になることがあります。
ここで バリアントが 登場します。

カタログには各ベース画像に対して複数のバリアントが示されています:標準版、(開発版)版、(FIPS)版。
バリアントの選択はセキュリティ体制に影響します。最終イメージでパッケージマネージャーなしでアプリケーションを動かせる場合(例えばマルチステージビルドなど)、必ず標準版を選びましょう。コンテナ内のツールが少なければ、潜在的な脆弱性も減ります。
彼らの意味はこうです:
標準的なバリアント(例:ノードベース:24-debian13):
- 最小実行時イメージ
- パッケージマネージャーはなし(apk、apt、yumは削除)
- 本番対応
- 最小攻撃面
FIPSのバリアント(例:ノードベース:24-debian13-fips):
- FIPSのバリアントはランタイム用とビルドタイム用のバリアントがあります
- これらのバリアントは、米国政府の安全な暗号操作標準であるFIPS 140の下で検証された暗号モジュールを使用しています
- これらは厳しく規制された環境で必要です
開発バリアント(例:ノードベース:24-debian13-dev):
- 追加の依存関係をインストールするためのパッケージマネージャーを含める
- 開発中やビルド時にパッケージを追加する必要がある時に役立ちます
- 攻撃面は大きい(ただし依然として強化されている)
- 生産にはおすすめしません
カタログには数十種類の画像が含まれています:言語ランタイム(Python、Node、Go)、ディストリビューション(Alpine、Ubuntu、Debian)、専門ツール(nginx、Redis)などです。
最初からすべてを評価しようとするのではなく、まずはよく使う画像(Alpine、Python、Nodeなどが一般的な出発点)を一 枚 絞って最初のテストに選んでみてください。
「権利」や「ミラーリング」とは何を意味するのか
エンタープライズ層では、Dockerのカタログから直接「dockerプル」するわけではありません。代わりに、まず組織の名前空間にイメージをミラーリングします。ワークフローは以下の通りです:
- トライアル はミラーリングを通じて一定数のDHIへのアクセスを組織に与えます。これを権利と呼びます。
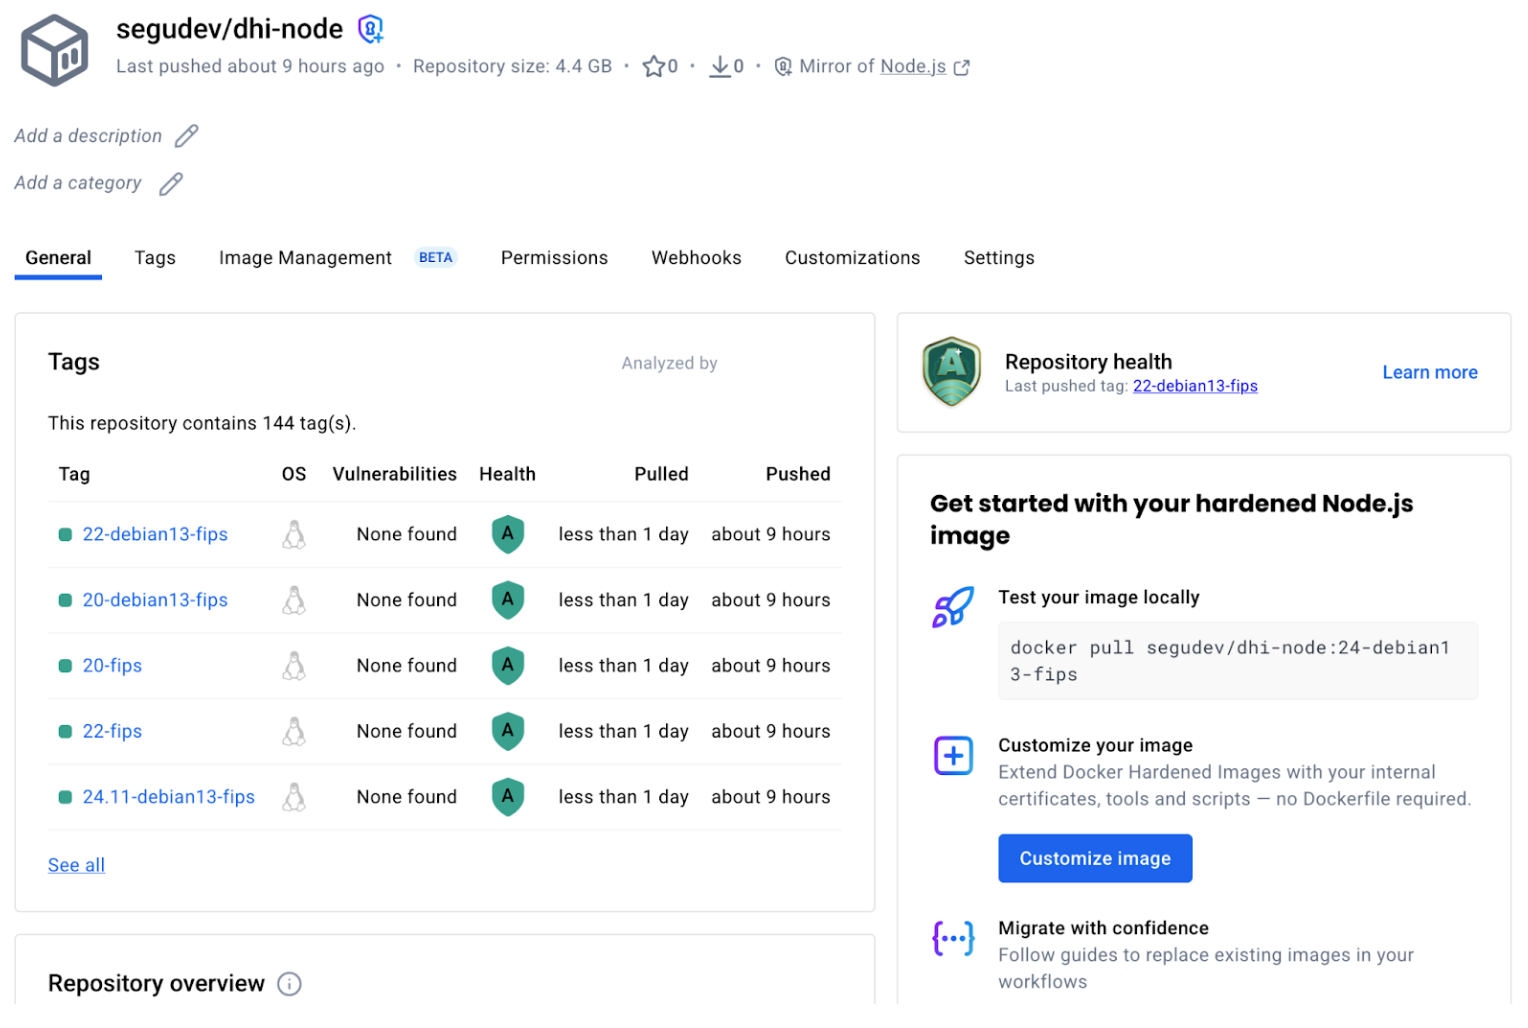
- 組織のオーナーとして、まず自分の名前空間(例:yourorg/dhi-node)でDHIイメージのコピーを作成します。これはイメージを ミラーリング していることを意味します。これにより、リポジトリ内で自動的に新しい更新を受け取ります。
- あなたのチームはDockerの名前空間ではなく、組織の名前空間から取得します。
ミラーリングは数分で完了し、利用可能なタグをすべてコピーします。完成すると、画像は他の画像と同様に組織のリポジトリに表示されます。
なぜこのモデルなのか?理由は二つあります。
- アクセス管理:組織管理者がチームで使用できるハードイメージをコントロールします
- 利用可能性:サブスクリプションが変更されてもミラー画像は引き続き利用可能です
「このイメージをリポジトリにミラーする」という言葉に初めて遭遇したとき、それは不必要な摩擦のように感じます。しかし、これはタグごとにではなくベース画像ごとに一度きりのセットアップだと理解すれば、納得できます。ノードベースを一度ミラーリングすれば、現在および将来のすべてのNodeバージョンにアクセスできます
硬化したイメージをミラーリングした今、実際のプロジェクトでテストする時です。
目標は、リスクが低い早い段階で摩擦点を見つけることです。

ステップ 2:あなたの初めての本格的な移住試験
以下のようなプロジェクトを選びましょう:
- 何か壊れてもすぐにデバッグできる(動く部品が少ない)
- 実際の作業負荷を表現できるほどリアルです
- スタックの代表
ドロップイン代替
Dockerfileを開き、FROM命令を探してください。移行は非常にシンプルです:
# Before
FROM node:22-bookworm-slim
# After
FROM <your-org-namespace>/dhi-node:22-debian13-fips
組織の名前空間を置き換え、適切なタグを選択してください。もしNode:22のような汎用タグを使っているなら、ハードンドカタログの特定のバージョンタグ(例: 22-debian13-fips)に切り替えてください。特定のバージョンにピンで留めるのがベストプラクティスです。画像を硬くすることでより明確になります。
他の言語ランタイムでも同様のパターンが見られます。
# Python example
FROM python:3.12-slim
# becomes
FROM <your-org-namespace>/dhi-python-base:3.12-bookworm

# Node example
FROM node:20-alpine
# becomes
FROM <your-org-namespace>/dhi-node-base:20.18-alpine3.20
新しいベースでイメージを組み立てる:
docker build . -t my-service-hardened
ビルド出力に注意してください:Dockerfileが特定のユーティリティ(wget、curl、パッケージマネージャーなど)が存在すると仮定すると、 ビルドが失敗する可能性があります。これは予想通りのことです。強化された基地は攻撃面を減らすために不要なツールを削ぎ落とします。よくあるビルドの失敗と修正方法をいくつかご紹介します:
パッケージマネージャーが欠けている(apt、美味しい):
- Dockerfileにパッケージをインストールする場合は(開発版)を使う必要があり、おそらくマルチステージビルドに切り替える(ビルドビルドのビルドで依存関係を開発バリアントでインストールし、最小実行時段階にコピーするFIPSハード化されたベースイメージバリアントを使う)が必要です。
ユーティリティが足りない(wget、curl、bash):
- ネットワークツールはデバッグバリアントを使っていない限り削除されます
- 解決策は、上記と同じで、ビルダー段階で明示的に必要なものをインストールするか、実行時にそれらのツールが本当に必要かどうかを確認することです
異なるデフォルトユーザー:
- 一部のハードドイメージはデフォルトで非rootとして動作します
- アプリケーションが特定のディレクトリに書き込みを期待している場合は、権限を調整したり、適切にUSER指令を使う必要があるかもしれません
私のNode.jsテストでは、変更なしでビルドは成功しました。強化されたNodeベースには、実行時に必要なすべてのものが含まれていました。npm依存関係は通常通りインストールされ、削除されたパッケージは私のアプリケーションが触れたことのないシステムユーティリティでした。
Verify It Running(実行確認)する
ビルド成功は実行時の成功を意味しません。容器を起動して、正しく動作するか確認してください:
docker run --rm -p 3000:3000 my-service-hardened
サービスのテスト:
- エラーなしで始まるのですか?
- APIエンドポイントは正しく応答しますか?
- ログは期待通りに書き込まれていますか?
- データベースや外部サービスに接続できますか?
ステップ 3:何が変わったのか比較する
測定に進む前に、硬化したものと一緒に元のバージョンを組み立ててください:
# Switch to your main branch
git checkout main
# Build original version
docker build . -t my-service-original
# Switch back to your test branch with hardened base
git checkout dhi-test
# Build hardened version
docker build . -t my-service-hardened
これで比較できる画像は2枚あります。1枚は公式ベース、もう1枚は硬化ベースです。さて、評価です:実際に何が改善し、どれくらい改善したのか?
Docker Scout
Docker Scoutは脆弱性、パッケージの違い、サイズ変更に関する画像やレポートを比較します。まだScoutに登録していない場合は、まずそれを行う必要があります(比較機能は無料です)。
比較を実行してください(ここではNodeベースの画像を比較しています):
docker scout compare --to <your-org-namespace>/dhi-node:24.11-debian13-fips node:24-bookworm-slim
スカウトは詳細な内訳を出力します。公式Node.js画像と硬化版を比較した結果は以下の通りです。
1。脆弱性の軽減
Scoutの出力は、重度別に行われた CVE カウントを示しています:
                     Official Node          Hardened DHI
                      24-bookworm-slim       24.11-debian13-fips
Critical              0                      0
High                  0                      0
Medium                1                      0  ← eliminated
Low                   24                     0  ← eliminated
Total                 25                     0
硬化した画像は完全な脆弱性除去を実現しました。公式イメージにはすでにクリティカル/ハイの危険性(良い基準)はゼロでしたが、中程度および低24重大度の問題1含まれており、これらはすべてハード化されたバージョンで解消されています。
中程度および低重大度の脆弱性はコンプライアンスフレームワークにとって重要です。SOC2、ISO 27001、または同様の認証(特に厳格なセキュリティ基準を持つ規制業界)を目指す場合、すべての重大度レベルで0のCCを示すことは監査を大幅に簡素化します。
2。パッケージ削減
Scoutはパッケージ数に劇的な違いを示しています:
                     Official Node          Hardened DHI
Total packages        321                    32
Reduction             —                      289 packages (90%)
硬化イメージは以下の 289 パッケージを削除しました:
- APT(パッケージマネージャー)
- GCC-12 (コンパイラツールチェーン全体)
- Perl(スクリプト言語)
- バッシュ(ミニマルシェルに置き換え)
- dpkg-dev (Debian package tools)
- GNUPG2、GZIP、BZIP2 (圧縮および暗号ユーティリティ)
- 数十のライブラリとシステムユーティリティ
これらはNode.jsアプリケーションが実行時に使わないツールです。パッケージを削除することで攻撃対象は大幅に減少します。パッケージ数 90%減れば、悪用の対象となる可能性が 90%減ります。
これは重要です。なぜなら、たとえ今日CVEがなくても、それらは将来的なリスクをもたらすからです。あなたのイメージにあったすべてのユーティリティ、ライブラリ、ツールが明日には脆弱性になる可能性があります。硬化したベースはそのリスクカテゴリー全体を排除します。
3。サイズ差
スカウトレポートの画像サイズ:
                     Official Node          Hardened DHI
Image size            82 MB                  48 MB
Reduction             —                      34 MB (41.5%)
硬化したイメージは 41。5%小さいサイズは、画像あたり1枚に節約34MBとなります。単一のサービスとしては、これは些細なことに思えるかもしれません。しかし、数十から数百のマイクロサービスに分散すると、その利点が明らかになります。より速い引き込み、ストレージコストの削減、ネットワーク転送の削減です。
4。SBOMの抽出と読み取り
最も価値のあるコンプライアンス機能の一つが組み込みのSBOM(ソフトウェア資材表)です。多くの画像では自分でSBOMを生成する必要がありますが、ハード画像は自動的にSBOMを含みます。
画像内のすべてのパッケージを見るためにSBOMを抽出します:
docker scout sbom <your-org-namespace>/dhi-node:24.11-debian13-fips --format list
これにより、完全なパッケージインベントリが出力されます:
Name                  Version          Type
base-files            13.8+deb13u1     deb
ca-certificates       20250419         deb
glibc                 2.41-12          deb
nodejs                24.11.0          dhi
openssl               3.5.4            dhi
openssl-provider-fips 3.1.2            dhi
...
タイプ欄は荷物の出所を示しています:
- deb: Debianシステムパッケージ
- dhi:Docker Hardened Imagesのカスタムパッケージ(FIPS認証のOpenSSLなど)
- docker:Docker管理のランタイムコンポーネント
SBOMには各コンポーネントの名前、バージョン、ライセンス、パッケージURL(パール)が含まれており、脆弱性追跡やコンプライアンス報告に必要なすべての情報が含まれています。
SBOMはSPDXやCycloneDX形式で簡単に取得でき、脆弱性追跡ツールで取り込むことができます:
# SPDX format (widely supported)
docker scout sbom <your-org>/dhi-node:24.11-debian13-fips \
  --format spdx \
  --output node-sbom.json
# CycloneDX format (OWASP standard)
docker scout sbom <your-org>/dhi-node:24.11-debian13-fips \
  --format cyclonedx \
  --output node-sbom-cyclonedx.json
SBOM以外にも、強化画像にはSLSAの出所、FIPS準拠、STIGスキャン、脆弱性スキャンなど 17 異なる証明が含まれます。これらの証言の検証方法と利用方法については、このブログシリーズのパート 2 でご紹介します。
信頼しつつも検証
あなたは今、以下のことをしています:
✅ 脆弱性の 100%を排除(25 CVE→ 0)
✅ 攻撃対象を 90%削減(321 パッケージ→ 32)
✅ 画像サイズを 41分縮小しました。5%(82 MB → 48 MB)
✅ コンプライアンス追跡のためにSBOMを抽出しました
紙の上では結果は良く見えますが、検証は生産の信頼を築きます。しかし、これらのセキュリティ主張を独立して どう検証 するのでしょうか?パート 2では、以下を探っていきます。
- すべての認証における暗号署名検証
- 公開のGitHubソースリポジトリにたどり着いたビルドの出所
- FIPS、STIG、CISコンプライアンスの証拠を深く掘り下げる
- SBOM駆動の脆弱性分析(エクスプロイタビリティの文脈付き)
関連ドキュメントを見る:


