One of the simplest examples that people have used over the years of demoing Docker is quickly standing up and running a Minecraft server. This shows the power of using Docker and has a pretty practical application!
Recently I wanted to set up a server but I wanted to persist one and as I have given away my last raspberry pi I needed to find a new way to do this. I decided that I would have a go at running this in Azure using the $200 free credits you get in your first month.
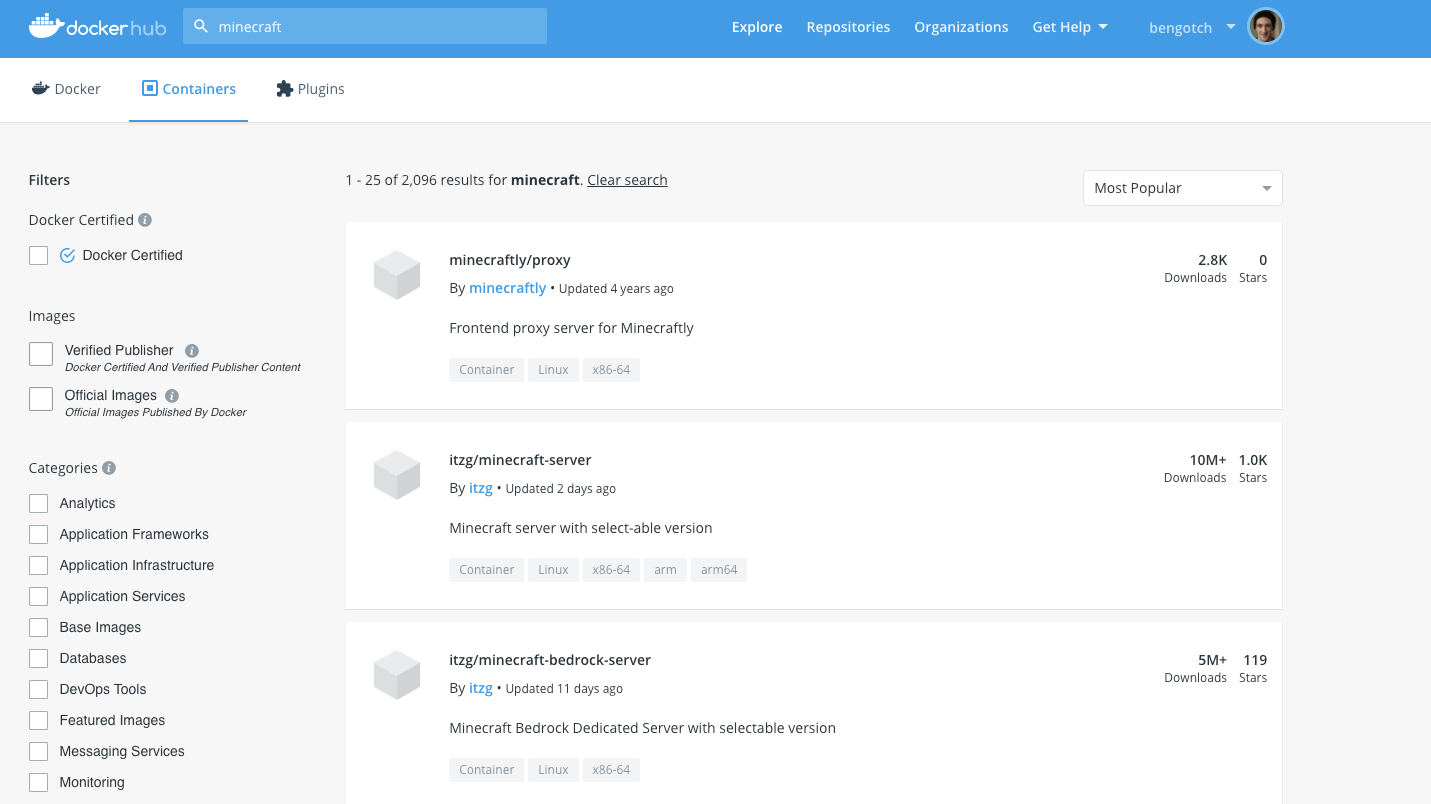
The first thing I decided to do was to check out the existing Docker Images for Minecraft servers to see if there were any that looked good to use, to do this I went to Docker Hub and searched for minecraft:

I liked the look of minecraft-server repo, so I clicked through to have a look at the image and link through to the Github repo.
To start I decide to just test out running this locally on my machine with the ‘simple get started’ Docker Run command:
$ docker run -d -p 25565:25565 --name mc -e EULA=TRUE
 itzg/minecraft-server
In the Docker Desktop Dashboard, I can see I have the container running and check the server logs to make sure everything has been initialized properly:
If I load up Minecraft I can connect to my server using local host and my open port:
From there, I can try to deploy this in Azure to just get my basic server running in the cloud.
With the Docker ACI integration, I can log into Azure using:
$ docker login azure
Once logged in, I can create a context that will let me deploy containers to an Azure resource group (this proposes to create a new azure resource group or use an existing one):
$ docker context create aci acicontext
Using only available subscription : My subscription (xxx)
? Select a resource group  [Use arrows to move, type to filter]
> create a new resource group
  gtardif (westeurope)
I can then use this new context :
$ docker context use acicontext
I will now try to deploy my minecraft server using the exact same command I ran previously locally :
$ docker run -d -p 25565:25565 --name mc -e EULA=TRUE itzg/minecraft-server
[+] Running 2/2
 ⠿ Group mc  Created                     4.6s
 ⠿ mc        Done                        36.4s
mc
Listing my azure containers, I’ll see the public IP that has been provided for my Minecraft server:
$ docker ps
CONTAINER ID        IMAGE                   COMMAND             STATUS         PORTS
mc                  itzg/minecraft-server                       Running        51.105.116.56:25565->25565/tcp
However, if I follow the logs of the ACI container, the server seems to be stuck in the initialization, and I cannot connect to it from Minecraft.
$ docker logs --follow mc
In the logs we see the Minecraft server reserves 1G of memory, which happens to be the default memory allocated to the entire container by ACI ; let’s increase a bit the ACI limit with the –memory option :
$ docker run -d --memory 1.5G -p 25565:25565 --name mc -e EULA=TRUE
itzg/minecraft-server
The server logs from ACI now show that the server initialized properly. I can run $ docker ps again to get the public IP of my container, and connect to it from Minecraft and start playing !
This is great, but now I want to find a way to make sure my data persists and reduce the length of the command I need to use to run the server.
To do this I will use a Compose file to document the command I am using, and next I will add a volume to this that I can mount my data to.
version: '3.7'
services:
 minecraft:
   image: itzg/minecraft-server
   ports:
     - "25565:25565"
   environment:
     EULA: "TRUE"
   deploy:
     resources:
       limits:
         memory: 1.5G
Looking at our command from before we have moved our image name into the image section, our -p for ports into the ports and added our EULA acceptance into the environment variables. We also ensure the server container has enough memory to start.
The command to start this locally is now much simpler:
$ docker-compose --project-name mc up
And to deploy to ACI, still using the ACI context I created previously:
$ docker compose --project-name mc2 up
[+] Running 2/2
 ⠿ Group mc2  Created                                6.7s
 ⠿ minecraft  Done                                   51.7s
Of course with compose, this allows the compose application to include multiple containers (here we only have the “minecraft” one). The containers are visible in the progress display (here the “minecraft” line).
And listing the containers shows the application name and the container name mc2_minecraft :
$ docker ps
CONTAINER ID                   IMAGE                  COMMAND      STATUS      PORTS
mc                             itzg/minecraft-server               Running     20.50.245.84:25565->25565/tcp
mc2_minecraft                  itzg/minecraft-server               Running     40.74.20.143:25565->25565/tcp
Next we will want to add a volume to include our Minecraft data and where we can load in other maps if we want. To do this I need to know what folder has the Minecraft data in the Docker image, if I go and inspect our running container in the Docker Dashboard I can see that it is the /Data directory:
If I wanted to add this back in my command line I would need to extend my command with something like:
docker run -d -p 25565:25565 --v /path/on/host:/data --name mc -e
EULA=TRUE itzg/minecraft-server
I can add this under the volumes in my Compose file:
version: '3.7'
services:
 minecraft:
   image: itzg/minecraft-server
   ports:
     - "25565:25565"
   environment:
     EULA: "TRUE"
   deploy:
     resources:
       limits:
         memory: 1.5G
   volumes:
     - "~/tmp/minecraft_data:/data"
Now when I do a docker compose up and come back to inspect I can see the /data folder in the container is now mounted to my local folder as expected. Navigating to this local folder I can see all Minecraft data.
Now let’s create an Azure File Share and deploy our application to mount /data to the Azure shared persistent folder so we can do the same thing in ACI.
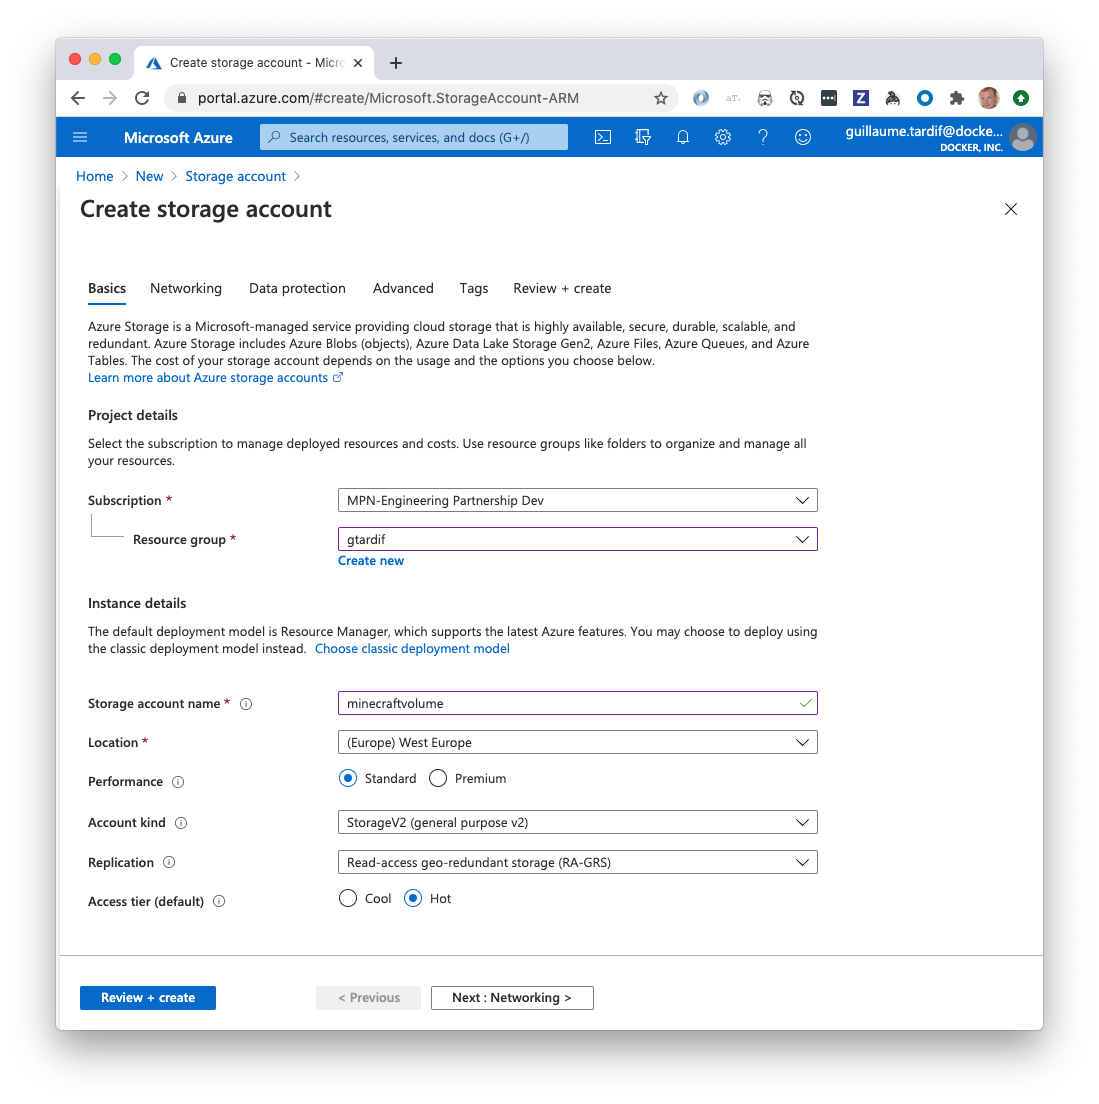
First I need to create an Azure storage account. We can do this using the Azure “az” command line, or through the Azure portal, I have decided to use the portal :

I need to specify a name for the storage account, select the resource group to attach to it, then I let the other options default for this example.
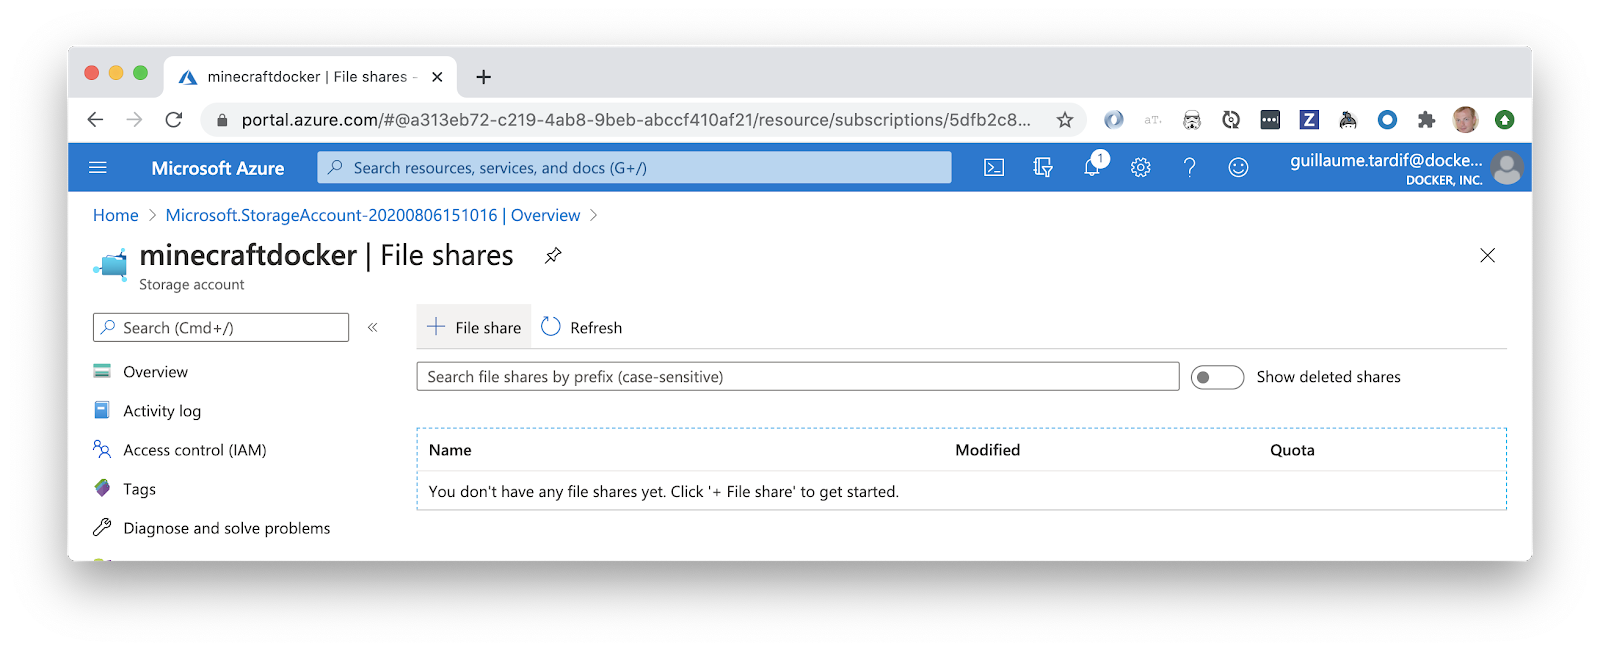
Once the ”minecraftdocker” storage account is created, I’ll create a file share that will hold all Minecraft files:

I just need to specify a name for this file share and a size quota ; let’s call it “minecraft-volume”:
Then in my compose file, I’ll update the volume specification to point to this Azure File Share:
version: '3.7'
services:
 minecraft:
   image: itzg/minecraft-server
   ports:
     - "25565:25565"
   environment:
     EULA: "TRUE"
   deploy:
     resources:
       limits:
         memory: 1.5G
   volumes:
     - "minecraft:/data"
volumes:
 minecraft:
   driver: azure_file
   driver_opts:
     share_name: minecraftdocker
     storage_account_name: minecraft-volume
Note that the syntax for specifying ACI volumes in Compose files is likely to change in the future.
I can then redeploy my compose application to ACI, still with the same command line as before:
$ docker --context acitest compose  --project-name minecraft up
[+] Running 2/2
 ⠿ Group minecraft  Created                                5.3s
 ⠿ minecraft        Done                                  56.4s
And I can check it’s using the Azure File Share, just selecting the minecraft-volume Share in the Azure portal: 
Security Note: in this Azure File Share web UI screenshot above, you can see the Minecraft server has created a server.properties with default values, and whitelist.json that contains an empty array.
Server.properties includes the whitelist disabled by default (“white-list = false”), and a default RCON password, that can be used for remote administration of the server (in our current setup, the RCON port has not been exposed so rcon cannot be used. You can expose port 25575 in addition to 25565 in the compose file if you want to use RCON ; don’t forget to change the password in server.properties first.
See https://minecraft.gamepedia.com/Server.properties for more details on Mineraft server properties.
You can download the server.properties file from Azure File Share, modify it, for example change RCON password or set “white-list” property to true and upload the file back to Azure File Share. Same for the whitelist.json file.
To restart the Minecraft server, you can simply re-issue the compose up command:
$ docker --context acitest compose --project-name minecraft up
It will redeploy the container, but reuse any data that’s in the volume, so it will load the server.properties & whitelist.json files you have uploaded on the Azure File Share.
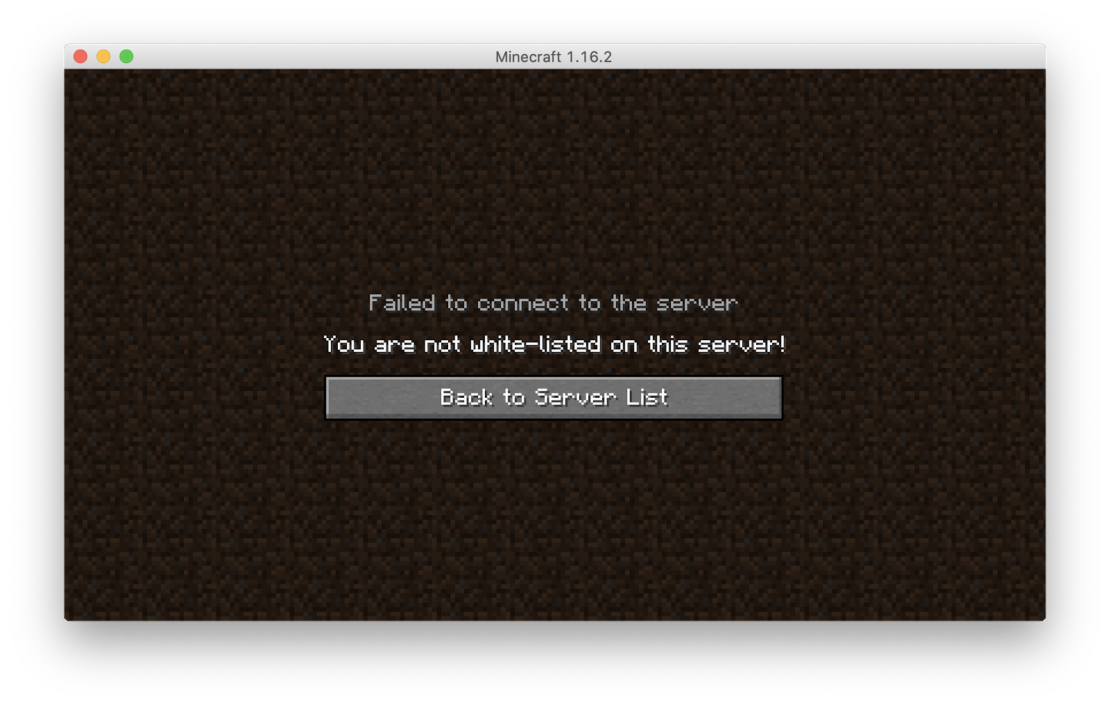
Trying to connect your Minecraft application if you’re not part of the white list, you will see:

To get started running your own Minecraft server you can download the latest Edge version of Docker Desktop. You can find the Minecraft image we used on Docker Hub, or start creating your own content from Dockers Official images. Or if you want to create content like this to share, create a Docker account and start sharing your ideas in your public repos.
