At Docker, we’re passionate about building tools that make other developers’ lives easier. When it comes to building and running containers, Docker Desktop is the go-to product for developers. With Docker Desktop 4.8.0, you can now add your own functionality to Docker Desktop and impact the lives of millions.
This blog post walks you through the steps on how to develop, install, and preview a simple extension inside Docker Desktop. By the end of this tutorial, you will have an extension with a basic user interface, including a button that, when clicked, makes an HTTP request to the extension backend and displays the response in Docker Desktop.

You can develop extensions in any text editor and use any language for the frontend which can be translated to JavaScript (including JavaScript itself!). To deliver the best experience for your users, we recommend using TypeScript and React / Material UI for the frontend. If you want to create a backend service for your extension (e.g. a RESTful API), you can build one in a language of your choice (Go, Python, dotnet, etc). The backend runs inside a container, giving you total freedom over your language and framework choices.
What a time to be a developer! Let’s get started building your first extension!
Prerequisites
To complete this tutorial, you’ll need:
- The latest version of Docker Desktop.
Create the extension files
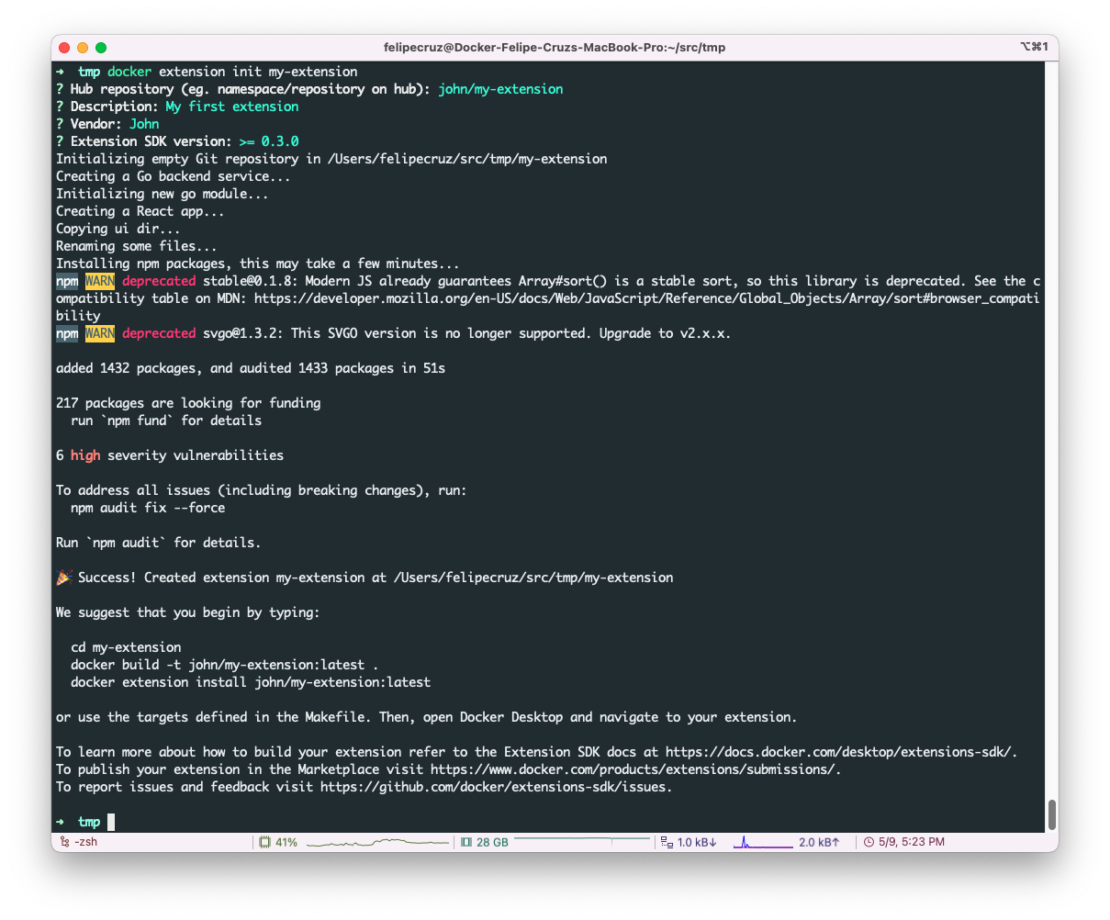
The quickest way to get started with your Docker Extension is to use the init command of the Docker Extensions CLI:
docker extension init my-extension
You’ll be prompted with a few questions about the extension that you want to build. These questions help the CLI to generate a set of boilerplate files for you in the my-extension directory.

The extension directory structure
The init command populates the given directory with all the files needed to define a Docker Extension:
- The
uidirectory, which contains a React app that makes an HTTP request to the backend service and displays the response. - The
vmdirectory, which contains a Go backend service (HTTP server) that listens on a socket and exposes the/helloendpoint that returns a JSON payload. - Some other files like
metadata.json, which contains information about the extension.

Build and install the extension
The init command creates a Makefile at the root of the extension directory. This makes it easier to build the extension for multiple platforms, install it locally, and push it to Docker Hub.
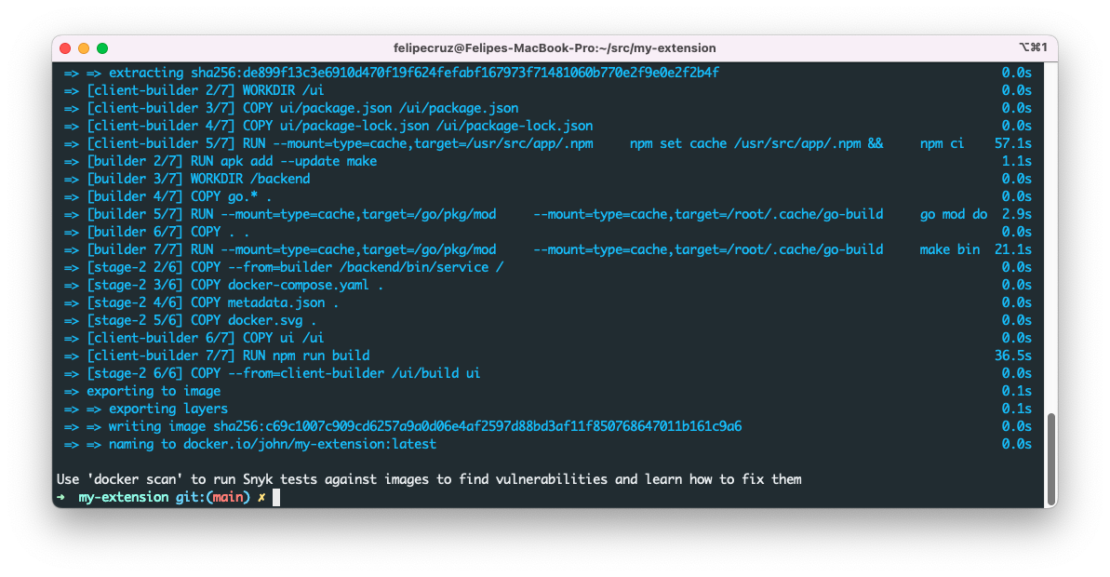
A Docker Extension is a Docker image, so the first step is to build the extension image.
A multi-stage Dockerfile is provided that consists of three stages: a first stage to build the backend service, a second for the React app, and a final stage where we copy the backend binary and the React assets. Finally, the CMD instruction starts the backend service, using a socket to listen for requests from the React app.
You can use docker build or the predefined make build-extension command to build the extension.

The previous command generates a Docker image named after the Docker Hub repository you provided to the init command. For this guide, we’re using john/my-extension. Feel free to use the same inputs for the purpose of this practice exercise. You won’t be able to push to that repository, but all the local development steps will still work.
To install the extension in Docker Desktop, run:
docker extension install john/my-extension
You should see the following output:
Installing new extension "john/my-extension:latest"
Installing service in Desktop VM...
Setting additional compose attributes
VM service started
Installing Desktop extension UI for tab "My-Extension"...
Extension UI tab "My-Extension" added.
Extension "my-extension" installed successfully
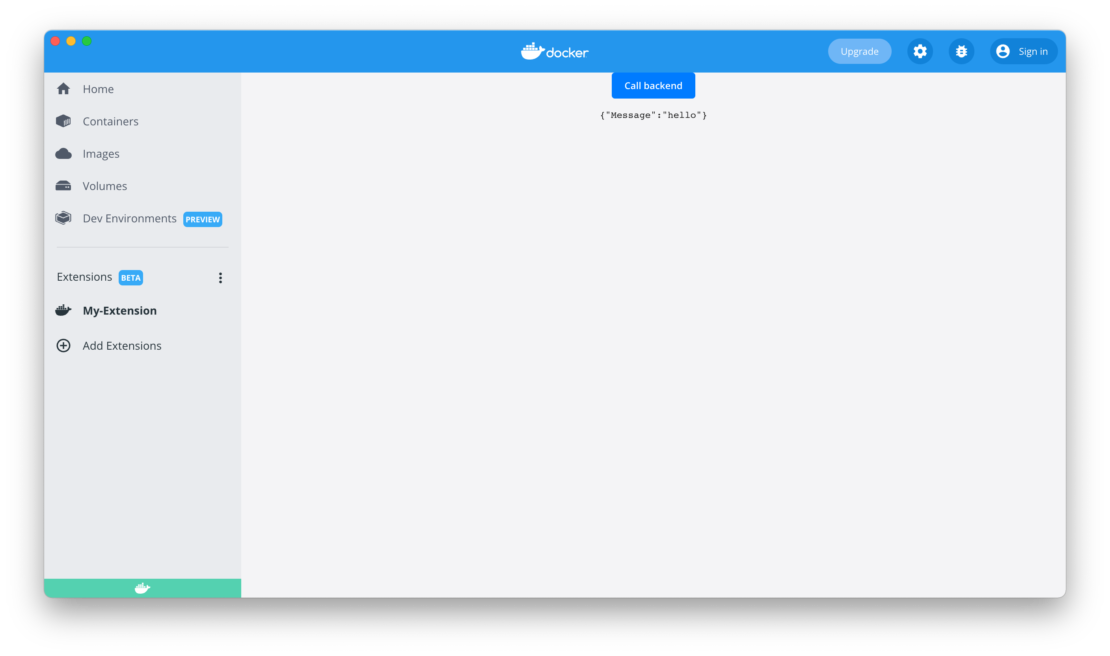
If you open Docker Desktop, on the left-hand menu you’ll see a new tab with the name My-Extension. Click on it to navigate to your extension and see the React app. When you click on the Call backend button, you’ll see {"Message":"hello"}displayed.

You can also check that the extension has been installed using the following CLI command:
docker extension ls
Output:
ID                  PROVIDER            VERSION             UI                    VM                  HOST
john/my-extension   John                latest              1 tab(My-Extension)   Running(1)          -
Make a change in the extension code
In order to make a change in the extension code and see the change, you need to re-build your image and then update your extension. We provide some shortcuts to these commands so that you don’t need to worry about:
make build-extension
make update-extension
Behind the scenes these commands are doing just:
docker build -t john/my-extension
docker extension update john/my-extension
The extension is reinstalled in Docker Desktop with your code changes and you can test it again.
Enable hot reloading
If you’re developing the Frontend side of the extension there’s no need to rebuild your image after every change, you can use the hot reload that’s built-in. Within this example, we are using React, with a simple create-react-app project, that exposes the Frontend on http://localhost:3000.
cd ui
npm start
docker extension dev ui-source john/my-extension http://localhost:3000
Close and reopen the Docker Desktop dashboard and go to your extension, all the changes to the frontend code are immediately visible after saving any code changes.
Once you’re done updating and testing your extension, you can remove the ui-source override by running:
docker extension dev reset john/my-extension
Open Chrome Dev Tools
In order to open the Chrome Dev Tools for your extension when clicking on the extension tab, run:
docker extension dev debug john/my-extension
Each subsequent click on the extension tab will also open Chrome Dev Tools. To stop this behavior, run:
docker extension dev reset john/my-extension
Change the backend service code
If you need to make changes in the backend service, you’ll also need to build the extension again:
make build-extension
make update-extension
Because in this example your extension has a backend service running as a container, the update command removes the backend container and starts the new one.
Styling your extension
Docker Desktop’s UI is written in React and Material-UI. We strongly recommend adopting this combination in your extension as well. This brings the benefit of using our Docker Material UI Theme to easily replicate Docker Desktop’s look & feel.
Check out our design guidelines.
Preview the extension in the Marketplace
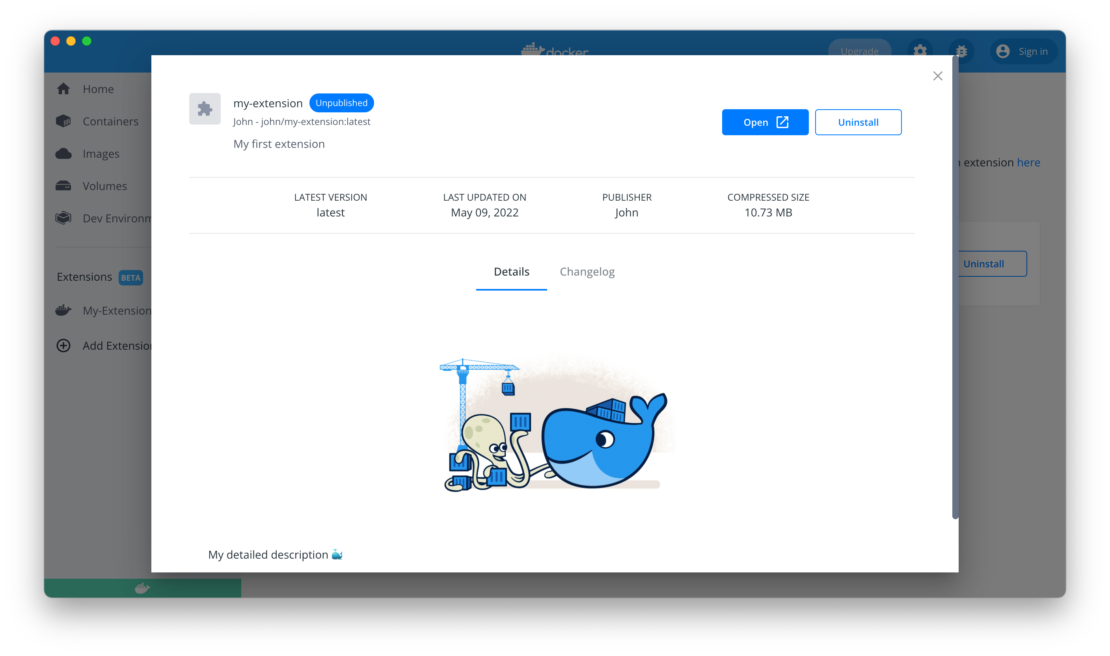
When you build and install your unpublished extension, you can preview it in the Marketplace Installed tab. This allows you to see how the extension description, screenshots and links are displayed on the details page of the extension before users install the extension.
You can provide all that information using LABELs in the Dockerfile:
LABEL org.opencontainers.image.title="my-extension" \
   org.opencontainers.image.description="My first extension" \
   org.opencontainers.image.vendor="John" \
   com.docker.desktop.extension.api.version=">= 0.2.3" \
   com.docker.extension.screenshots="[{\"alt\": \"docker build\", \"url\": \"https://www.docker.com/app/uploads/2021/09/Docker-build.png\"}]" \
   com.docker.extension.detailed-description="My detailed description 🐳" \
   com.docker.extension.publisher-url="" \
   com.docker.extension.additional-urls="[{\"title\":\"Documentation\",\"url\":\"https:\/\/foo.bar\/docs\"},{\"title\":\"Support\",\"url\":\"https:\/\/foo.bar\/support\"}}]]"

What’s next?
If you haven’t tried Docker Extensions, we highly encourage you to explore the Extensions Marketplace and install some of them! You can start developing Docker Extensions on all platforms: Windows, WSL2, Mac Intel and Apple Silicon, and Linux.
To learn more about the Extensions SDK, have a look at the official documentation. You’ll find tutorials, design guidelines, and everything you need to build Docker Extensions.
Do you want to submit your extension to the Extensions Marketplace? Click here.
Do you want to submit feedback? Click here
