I was curious the other day how hard it would be to actually set up my own blog or rather I was more interested in how easy it is now to do this with containers. There are plenty of platforms that host blogs for you but is it really now as easy to just run one yourself?
In order to get started, you can sign up for a Docker ID, or use your existing Docker ID to download the latest version of Docker Desktop Edge which includes the new Compose on ECS experience.
Start with the local experience
To start I setup a local WordPress instance on my machine, grabbing a Compose file example from the awesome-compose repo.
Initially I had a go at running this locally on with Docker Compose:
$ docker-compose up -d
Then I can get the list of running containers:
$ docker-compose ps
    Name                          Command               State          Ports
    --------------------------------------------------------------------------------------
    deploywptocloud_db_1          docker-entrypoint.sh --def ...   Up      3306/tcp, 33060/tcp
    deploywptocloud_wordpress_1   docker-entrypoint.sh apach ...   Up      0.0.0.0:80->80/tcp
And then lastly I had a look to see that this was running correctly: 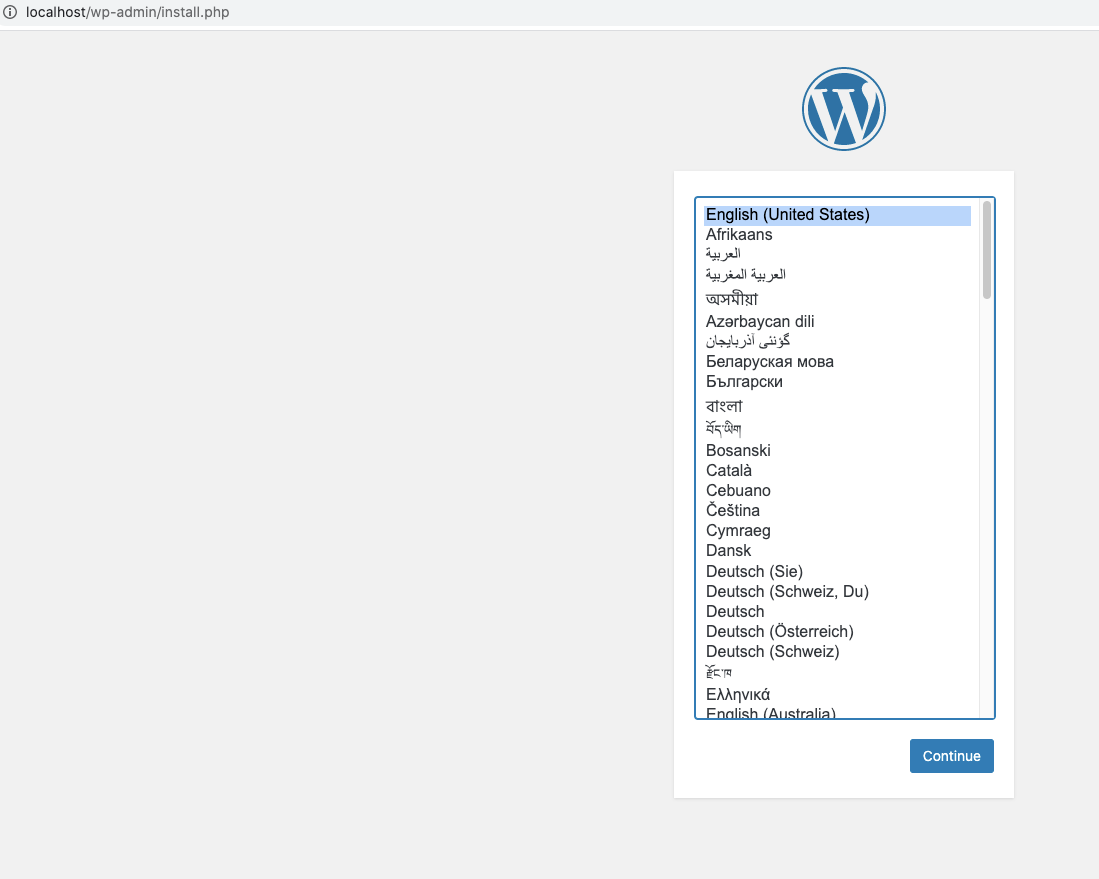
Deploy to the Cloud
Great! Now I needed to look at the contents of the Compose file to understand what I would want to change when moving over to the cloud.
I am going to be running this in Elastic Container Service on AWS using the new Docker ECS integration in the Docker CLI. This means I will be using some of the new docker ecs compose commands to run things rather than the traditional docker-compose commands. (In the future we will be moving to just docker compose everywhere!)
version: '3.7'
    services:
    db:
    image: mysql:8.0.19
    command: '--default-authentication-plugin=mysql_native_password'
    restart: always
    volumes:
    - db_data:/var/lib/mysql
    environment:
    - MYSQL_ROOT_PASSWORD=somewordpress
    - MYSQL_DATABASE=wordpress
    - MYSQL_USER=wordpress
    - MYSQL_PASSWORD=wordpress
    wordpress:
    image: wordpress:latest
    ports:
    - 80:80
    restart: always
    environment:
    - WORDPRESS_DB_HOST=db
    - WORDPRESS_DB_USER=wordpress
    - WORDPRESS_DB_PASSWORD=wordpress
    - WORDPRESS_DB_NAME=wordpress
    volumes:
    db_data:
Normally here I would move my DB passwords into a secret, but secret support is still to come in the ECS integration so for now we will keep our secret in our Compose file.
The next step is to now consider how we are going to run this in AWS, to continue you will need to have an AWS account setup.
Choosing a Database service
Currently the Compose support for ECS in Docker doesn’t support volumes (please vote on our roadmap here), so we probably want to choose a database service to use instead. In this instance, let’s pick RDS.
To start let’s open up our AWS console and get our RDS instance provisioned.
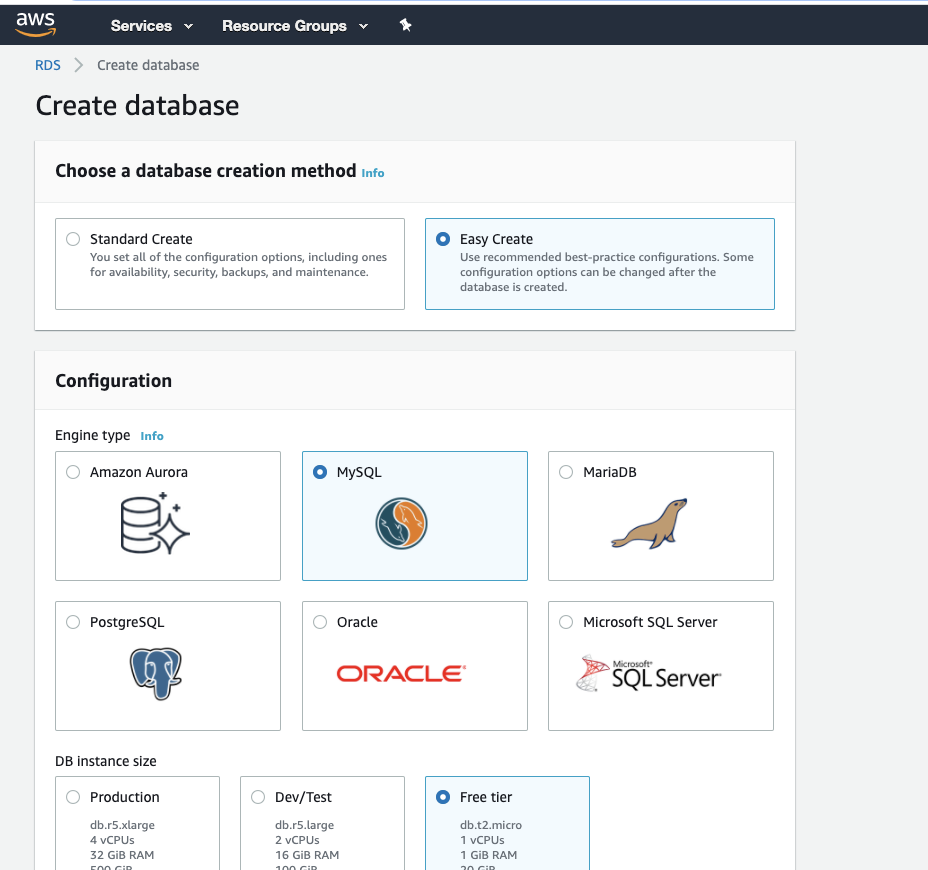
Here I have gone into the RDS section and I will choose the MySQL instance type to match what I was using locally and also choose the lowest tier of DB as that is all I think I need.
I now enter the details of my DB making sure to note the password to include in my Compose file: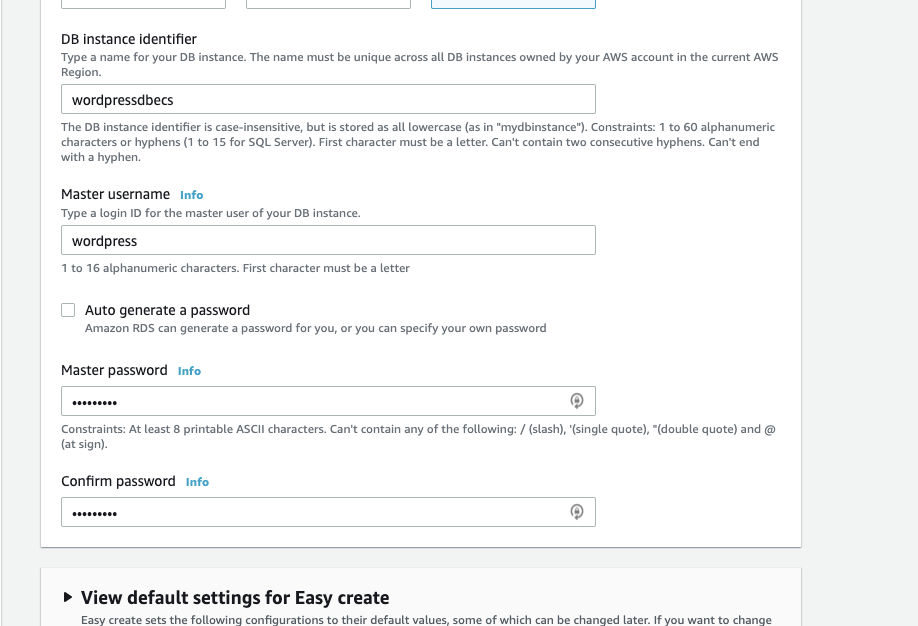
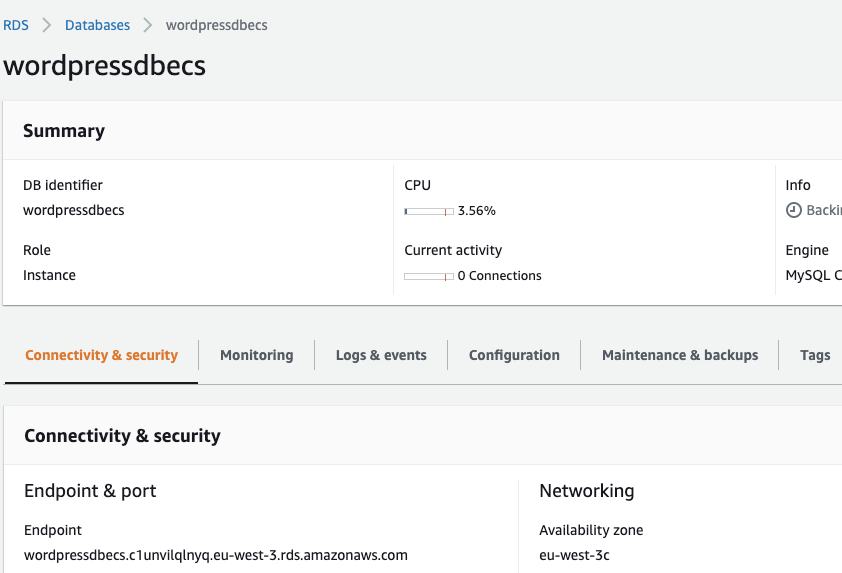
Great, now we need to update our Compose file to no longer use our local MYSQL and instead use the RDS instance. For this I am going to make a ‘prod’ Compose file to use, I will also need to grab my DB host name from RDS.
Adapting our Compose File
I can now update my compose file by removing the DB running in a container and adding my environment information.
version: '3.7'
    services:
    wordpress:
    image: wordpress:latest
    ports:
    - 80:80
    restart: always
    environment:
    WORDPRESS_DB_HOST: wordpressdbecs.c1unvilqlnyq.eu-west-3.rds.amazonaws.com:3306
    WORDPRESS_DB_USER: wordpress
    WORDPRESS_DB_PASSWORD: wordpress123
    WORDPRESS_DB_NAME: wordpressdbecs
What we can see is that the Compose file is much smaller now as I am taking a dependency on the manually created RDS instance. We only have a single service (“wordpress”) and there is no more “db” service needed.
Creating an ecs context and Deploying
Now we have all the parts ready to deploy, we will start by setting up our ECS context by following these steps
- Create a new ECS context by running:
docker ecs setup
- We will be asked to name our context, I am just going to hit enter to name my context
ecs - We will then be asked to select an AWS profile, I don’t already have the AWS extension installed so I will select new profile and name it ‘myecsprofile’
- I will then need to select a region, I am based in Europe so will enter
eu-west-3(make sure you do this in the same region you deployed your DB earlier!) - Now either you will need to enter an AWS access key here or if you are already using something like AWS okta or an AWS CLI you will be able to say N here to use your existing credentials
- With all of this done you may still get the error message that you need to ‘migrate to the new ARN format’ (Amazon Resource name). You can read more about this on the Amazon blog post here.
To complete the change you will need to go to the console settings for your AWS account and move over your opt in to an ‘enabled’ state then save the setting: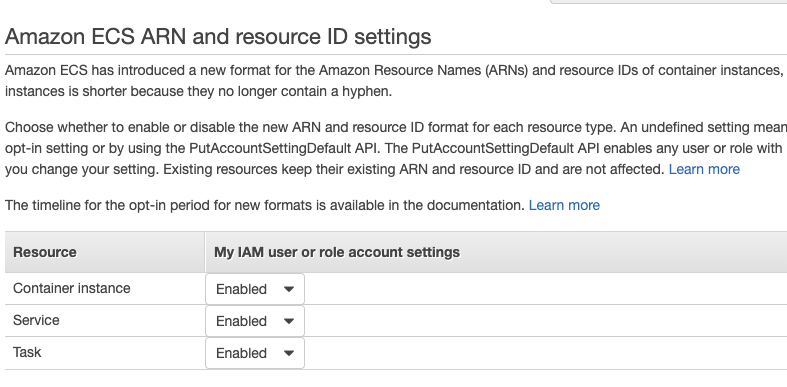
- Let’s now check that our ECS context has been successfully created by listing the available contexts using
docker context ls - With this all in place we can now use our new ECS context to deploy! We will need to set our ECS context as our current focus :
docker context use ecs
- Then we will be able to have our first go at deploying our Compose Application to ECS using the compose up command :
docker ecs compose up
- With this complete we can check the logs to our WordPress to see that everything is working correctly :
docker ecs compose logs
- It looks like our WordPress instance cannot access our DB, if we jump back into the Amazon web console and have a look at our DB settings using the ‘modify’ button on the overview page, we can see in our security groups that our WordPress deployment is not included as only the default group is:
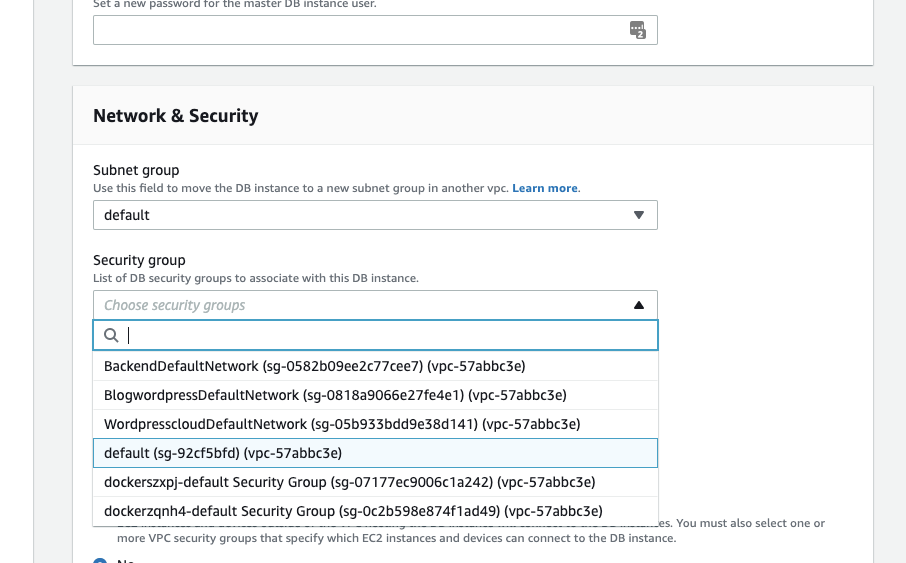
You should be able to see your container project name (I have a couple here from prepping this blog post a couple of times!). You will want to add this group in with the same project name and then save you changes to apply immediately.
Creating an ecs context and deploying
Now I run: docker ecs compose ps

From the command output I can grab the full URL including my port and navigate to my site newly deployed to the Cloud using my web browser:
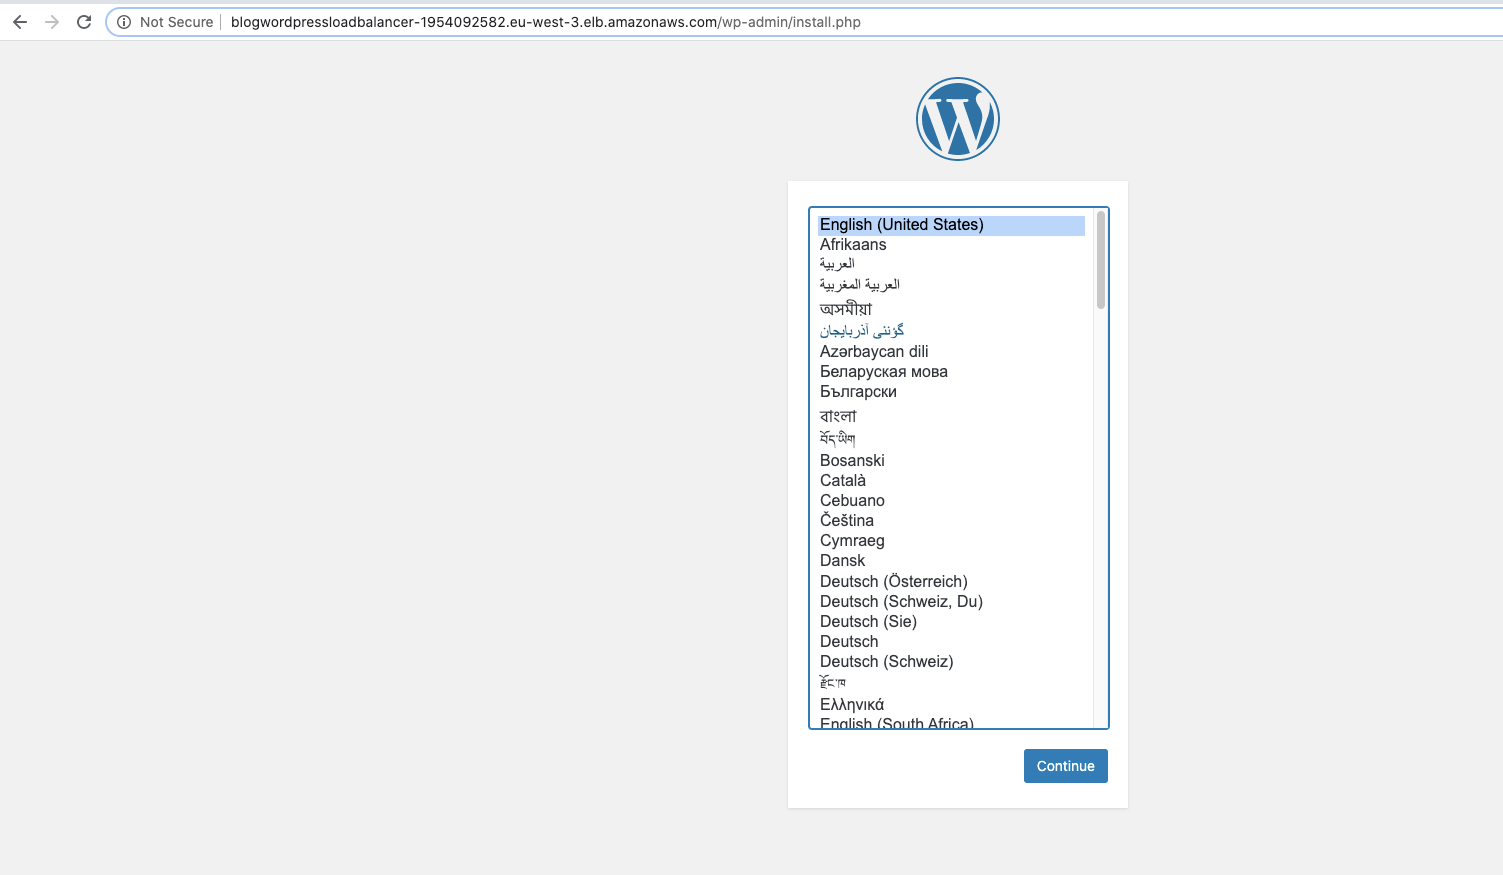
Great! Now we have 2 compose files, one that lets us work on this locally and one that lets us run this in the cloud with our RDS instance.
Cleaning resources
Remember when you are done if you don’t want to keep your website running (and continuing to pay for it) to use a docker compose down and you may want to remove your RDS instance as well.
Conclusion
There you have it, we have now got a wordpress instance we can deploy either locally with persistent state or in the cloud!
To get started remember you will need the latest Edge version of Docker Desktop, if you want to do this from scratch you can get started with the WordPress Official Image or you could try this with one of the other Official images on Hub. And remember if you want to run anything you have created locally in your ECS instance you will need to have saved it to Docker Hub first. To start sharing your content on Hub check out our get started guide for Hub.
