Goose is an innovative CLI assistant designed to automate development tasks using AI models. Docker Model Runner simplifies deploying AI models locally with Docker. Combining these technologies creates a powerful local environment with advanced AI assistance, ideal for coding and automation.
Looking for a seamless way to run AI-powered development tasks locally without compromising on privacy or flexibility? Look no further. By combining the power of Goose, a CLI-based AI assistant, with Docker Model Runner, you get a streamlined, developer-friendly setup for running large language models right on your machine.
Docker Model Runner makes it easy to run open-source AI models with Docker, no cloud APIs or external dependencies required. And the best part? It works out of the box with tools like Goose that expect an OpenAI-compatible interface. That means you can spin up advanced local assistants that not only chat intelligently but also automate tasks, run code, and interact with your system, without sending your data anywhere else.
In this guide, you’ll learn how to build your own AI assistant with these innovative tools. We’ll walk you through how to install Goose, configure it to work with Docker Model Runner, and unleash a private, scriptable AI assistant capable of powering real developer workflows. Whether you want to run one-off commands or schedule recurring automations, this local-first approach keeps you in control and gets things done faster.
Install Goose CLI on macOS
Goose is available on Windows, macOS, and Linux as a command-line tool, and also has a desktop application for macOS if that’s what you prefer. In this article, we’ll configure and show the CLI version on macOS.
To install Goose on you can use this handy curl2sudo oneliner technique:
curl -fsSL https://github.com/block/goose/releases/download/stable/download_cli.sh | bash
Enable Docker Model Runner
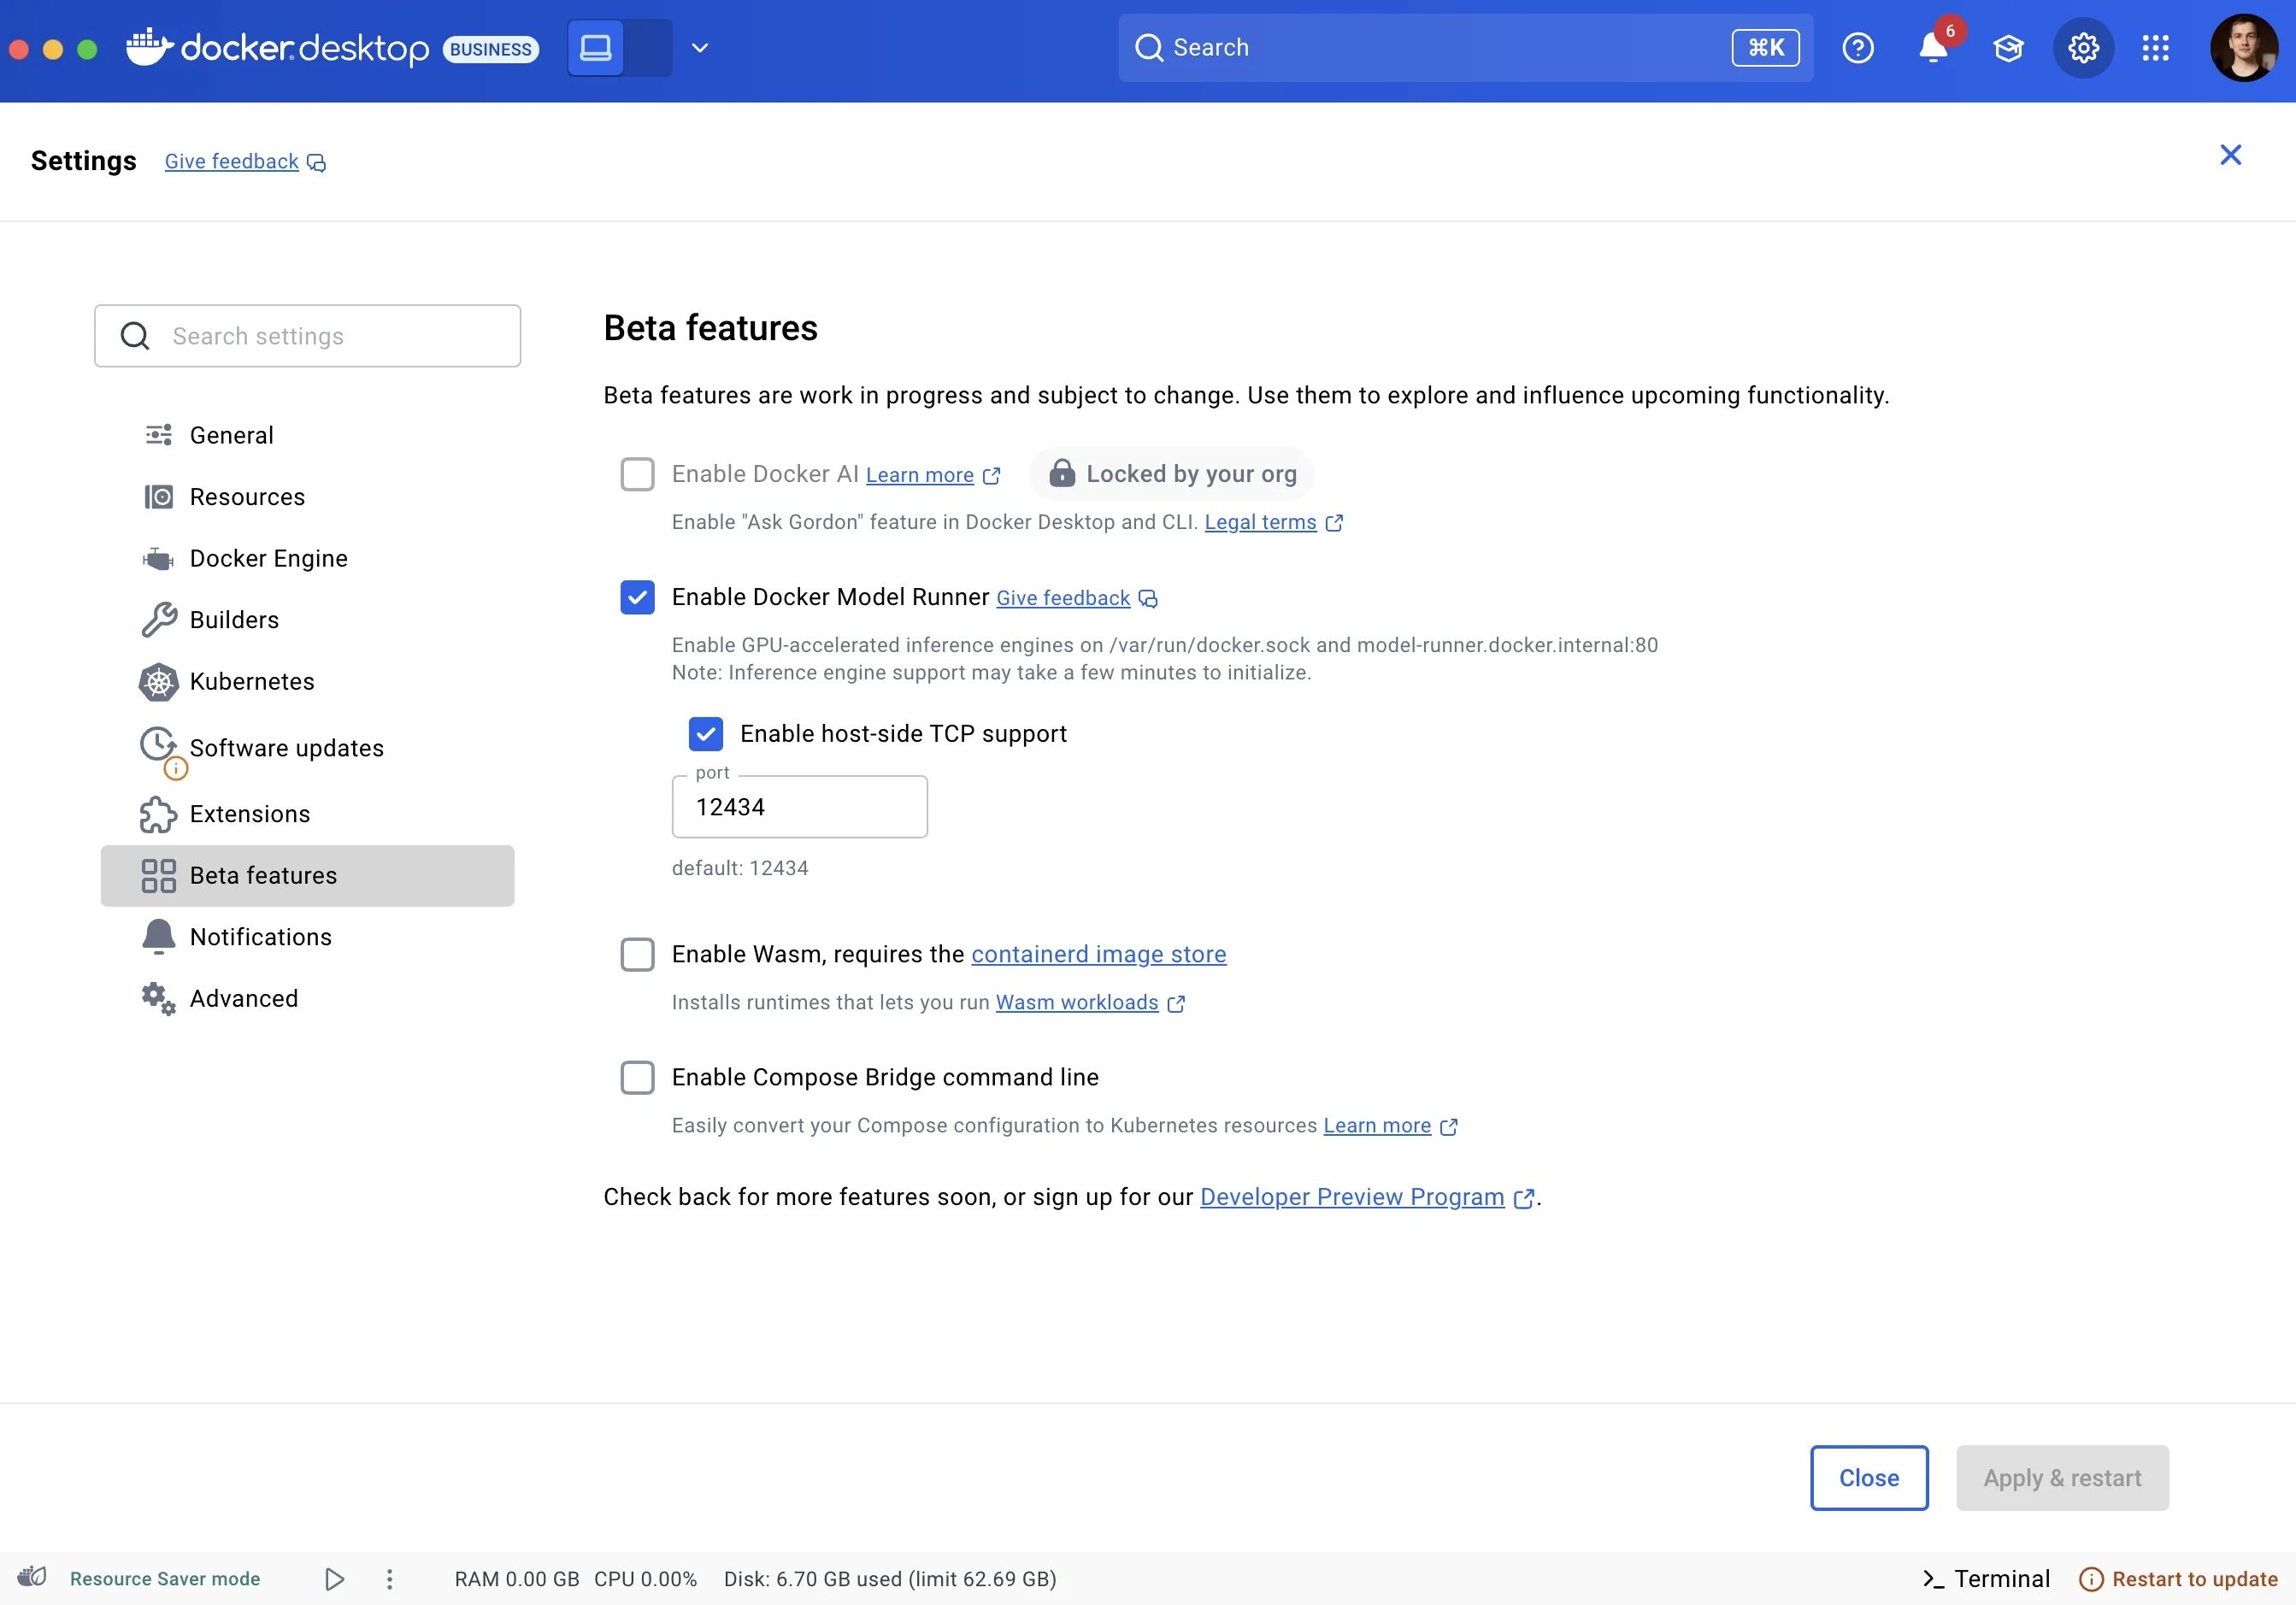
First, ensure you have Docker Desktop installed. Then, configure Docker Model Runner with your model of choice. Go to Settings > Beta features and check the checkboxes for Docker Model Runner.
By default, it’s not wired to be available from your host machine, as a security precaution, but we want to simplify the setup and enable the TCP support as well. The default port for that would be 12434, so the base URL for the connection would be: http://localhost:12434

Figure 1: Docker Desktop beta features settings showing how to enable port 12434
Now we can pull the models from Docker Hub: hub.docker.com/u/ai and run the models. For this article, we’ll use ai/qwen3:30B-A3B-Q4_K_M because it gives a good balance of world knowledge and intelligence at just 3B active parameters:
docker model pull ai/qwen3:30B-A3B-Q4_K_M
docker model run ai/qwen3:30B-A3B-Q4_K_M
This command starts the interactive chat with the model.
Configure Goose for Docker Model Runner
Edit your Goose config at ~/.config/goose/config.yaml:
GOOSE_MODEL: ai/qwen3:30B-A3B-Q4_K_M
GOOSE_PROVIDER: openai
extensions:
  developer:
    display_name: null
    enabled: true
    name: developer
    timeout: null
    type: builtin
GOOSE_MODE: auto
GOOSE_CLI_MIN_PRIORITY: 0.8
OPENAI_API_KEY: irrelevant
OPENAI_BASE_PATH: /engines/llama.cpp/v1/chat/completions
OPENAI_HOST: http://localhost:12434
The OPENAI_API_KEY is irrelevant as Docker Model Runner does not require authentication because the model is run locally and privately on your machine.
We provide the base path for the OpenAI compatible API, and choose the model GOOSE_MODEL: ai/qwen3:30B-A3B-Q4_K_M that we have pulled before.
Testing It Out
Try Goose CLI by running goose in the terminal. You can see that it automatically connects to the correct model, and when you ask for something, you’ll see the GPU spike as well.

Figure 2: Goose CLI running in terminal, showing example of response to local prompts
Now, we also configure Goose to have the Developer extension enabled. It allows it to run various commands on your behalf, and makes it a much more powerful assistant with access to your machine than just a chat application.
You can additionally configure the custom hints to Goose to tweak its behaviour using the .goosehints file.
And what’s even better, you can script Goose to run tasks on your behalf with a simple one-liner:
goose run -t "your instructions here" or goose run -i instructions.md
where instructions.md is the file with what to do.
On macOS you have access to crontab for scheduling recurrent scripts, so you can automate Goose with Docker Model Runner to activate repeatedly and act on your behalf. For example, crontab -e, will open the editor for the commands you want to run, and a line like the one below should do the trick:
5 8 * * 1-5 goose run -i fetch_and_summarize_news.md
Will make Goose run at 8:05 am every workday and follow the instructions in the fetch_and_summarize_news.md file. For example, to skim the internet and prioritize news based on what you like.
Conclusion
All in all, integrating Goose with Docker Model Runner creates a simple but powerful setup for using local AI for your workflows.
You can make it run custom instructions for you or easily script it to perform repetitive actions intelligently.
It is all powered by a local model running in Docker Model Runner, so you don’t compromise on privacy either.
Learn more
- Read our quickstart guide to Docker Model Runner.
- Find documentation for Model Runner.
- Subscribe to the Docker Navigator Newsletter.
- New to Docker? Create an account.
- Have questions? The Docker community is here to help.


